Last month I posted about my Linux Surveillance Camera Software Evaluation and my plans for turning some Amcrest IP cameras into a home security system. I’ve made a lot of progress and some big changes since then and decided that I had better post an update before the effort of doing so becomes overwhelming. There are a lot of changes and new information, and some really cool plans for the future (this has become my new obsession, albeit a prohibitively expensive one), so I’ll break this up into a number of sections.
Amcrest Cameras
I’m extremely happy with the two Amcrest cameras I purchased, and am planning to add two more at some point in the near future to cover the rest of the exterior of my house. The one I currently have outside is an Amcrest IPM-723W WiFi camera with a 1.3MP 1280x960 resolution and a 92º field of view. It’s a decent camera and the resolution is perfectly adequate but I wouldn’t mind a bit more, and more importantly, both sides of my house would benefit a lot from a winder field of view. I believe I’ve settled on two Amcrest IP2M-852W, which are similar outdoor WiFi cameras but with 1920x1080 resolution and a super-wide 128º field of view.
I received some questions via email after writing this post about the Amcrest cameras with Linux as well as the security of them. I think I’m quite happy with both, but both with some caveats. First of all, regarding security, I’m skeptical of the security of any proprietary software (especially from a small vendor or one not in the software business) and generally expect all IoT devices to have abysmal security. When I originally purchased the devices, I blocked all Internet-bound traffic from them at my router before even plugging them in. For the time being at least, I’m going to assume that to be enough for my needs. I certainly wouldn’t expose these directly to the Internet or allow them to access both the Internet and my home network, as is the case for any consumer-oriented devices.
I’ve also received some questions about the Linux support for Amcrest cameras. My experience so far has been consistent with my Amcrest IP Camera First Impressions - Jason Antman’s Blog. The cameras certainly work fine under Linux in general; they can be fully controlled and configured via any browser and you can view the low-resolution MJPEG stream in any browser. Viewing the full-resolution RTSP stream requires either the Amcrest Web View Chrome app or a viewer that supports RTSP streams (VLC or any common surveillance camera software). Aside from watching the stream in VLC or Amcrest Web View while I was outside aiming the camera, I’ve been using either the low-res MJPEG stream in a browser or, more recently ZoneMinder and HomeAssistant, to view it. Unless you want a closed-source native desktop app, I can’t find any meaningful difference between how the cameras work on Linux vs Mac or presumably Windows.
IR Illuminator
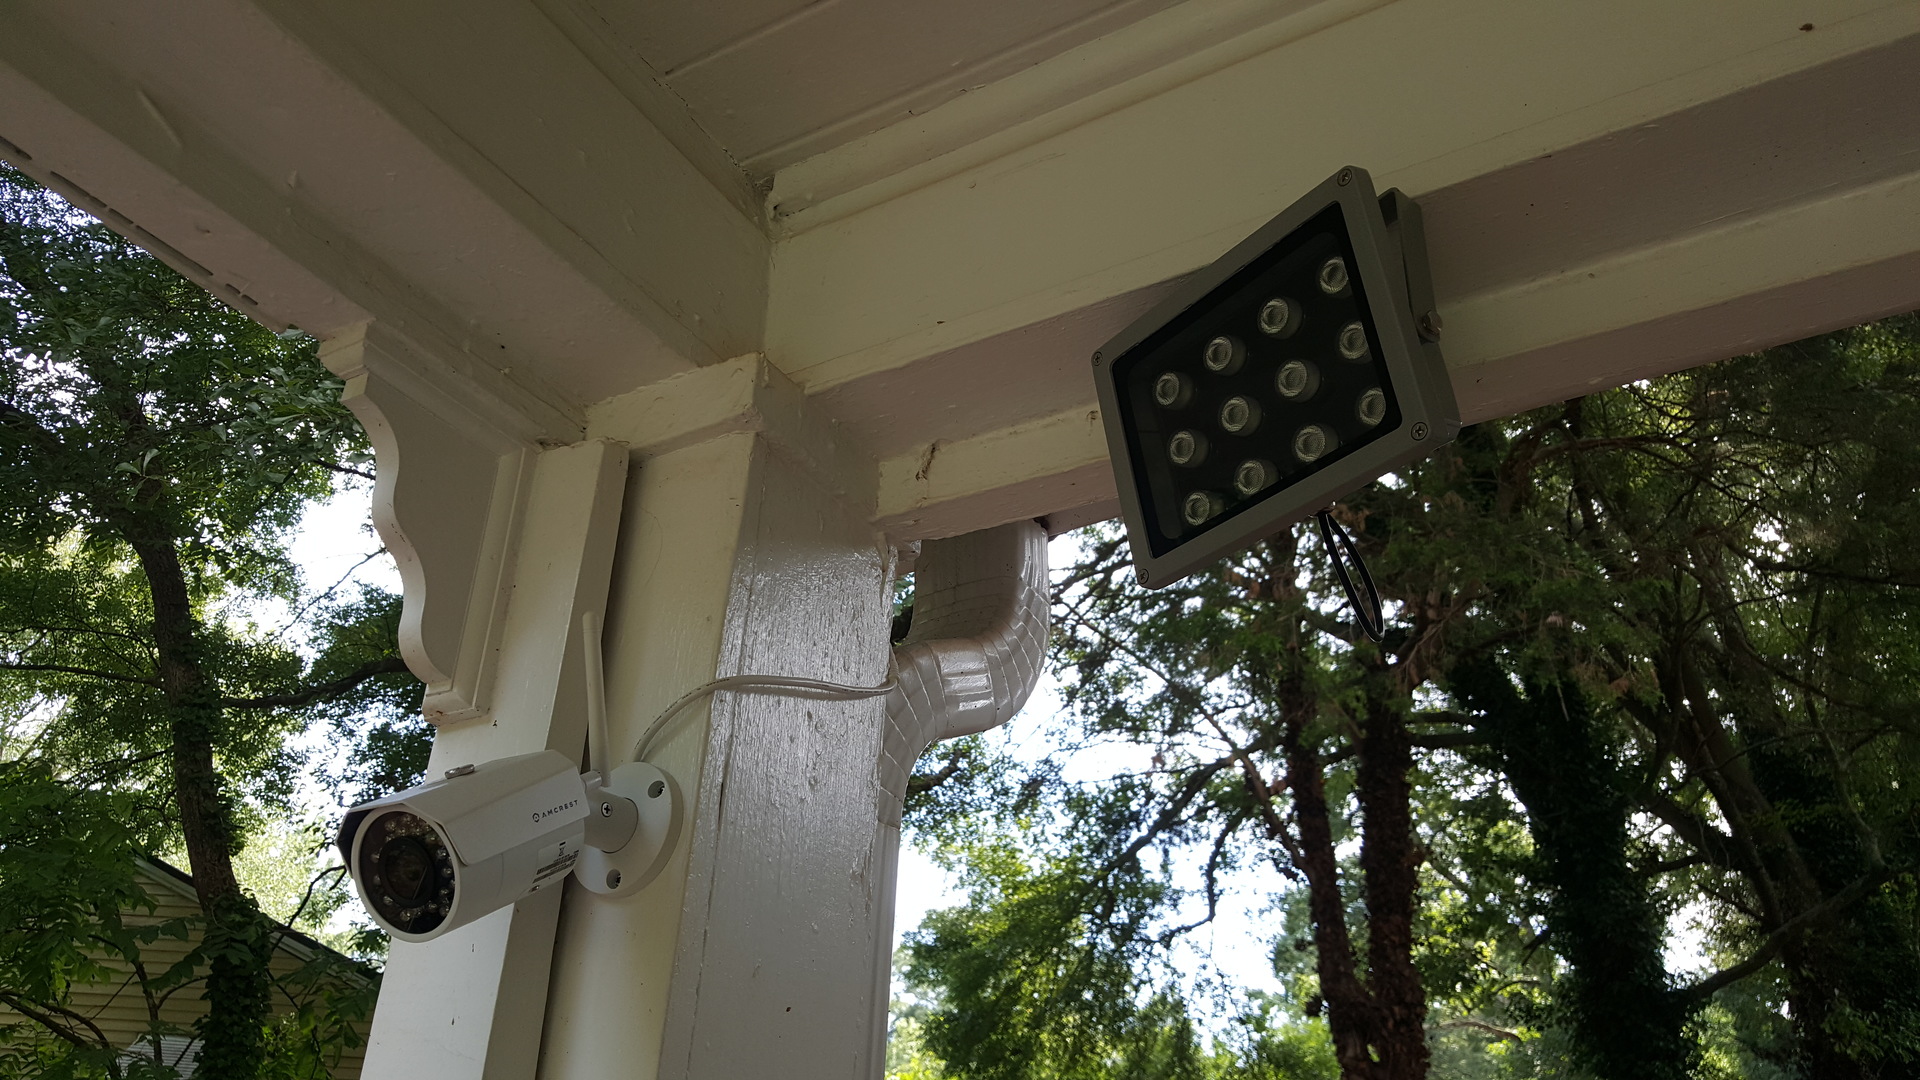
My first step in attempting to reduce false-positive motion detection caused by flying bugs at night was purchasing an external IR illuminator. I opted for a 12V DC model on amazon that uses the same power supply as the camera (I purchased a splitter for them), the Univivi 850nm 12 LED Wide Angle IR Illuminator. It’s a large-ish unit that looks much like a LED floodlight, except that when on it emits only a barely-visible red glow from the LEDs. This has helped immensely; I have it placed about a foot and a half away from the camera and it has dramatically cut down on (but not eliminated) the number of times that the motion detection is triggered at night by moths and other light-seeking insects. That being said, with some of the advances I’ve made in other areas (read on) I probably won’t be replicating this for my other cameras, at least not initially. I will also remark that the light output from this unit isn’t wide enough to cover the camera’s whole field of view, and it does suffer from some definite hot spots.
Here’s a view of the camera and IR illuminator during the day:
And here’s a view of it at night. Note that this was taken in almost total darkness and to the human eye the illuminator only emits a barely-visible red glow; unfortunately this photo does more to illustrate how sensitive my phone camera is to IR than what it actually looks like.

Surveillance Software - ZoneMinder
When I last posted I’d done an evaluation of a number of options for Linux-based video surveillance, discounted ZoneMinder mainly because of its age, resource requirements, and difficulty getting it running in Docker. I ended up settling on the Motion Project (motion) because of its simplicity and low resource requirements. Unfortunately, that path ended up being a dead end.
I spent quite a bit of time tuning motion and developing a horribly simple proof-of-concept web interface for it (the defunct project lives at https://github.com/jantman/motion-pipeline if anyone is interested) and playing with masks and various values to get reliable motion detection at 1920x1080 10fps on a RaspberryPi 3B+. While I eventually got that working including notifications with images, it failed completely when I installed the camera in its final environment - the exterior of my house. No matter how hard I tried, I couldn’t get the motion detection to capture legitimate events but ignore the large amounts of shadow motion when wind caught the trees around my house. I hadn’t considered this relatively obvious issue when I did my initial tests at my former (and relatively tree-free) apartment complex. It’s also worth noting that when running motion detection at 1920x1080 10fps, the RaspberryPi 3B+ was essentially at its limits; if I wanted to add another camera of equal resolution and frame rate I’d need a Pi per camera.
After that non-starter I remembered that the motion detection algorithm in motion only takes luminance into account (effectively a black-and-white image) but ZoneMinder uses full color in its motion detection. So, I decided to take another look at ZoneMinder. After some initial hiccups I decided to just install the zoneminder package on the RaspberryPi 3B+ running Debian 9. After a bit of setup, I had it running and processing 1920x1080 10fps on the Pi. This taxed the system quite a bit and the web UI was almost unusably sluggish, but it was enough for me to get ZM up and running and to prove that its motion detection algorithm handles clouds and shadows much better than motion.
It was apparent that if I wanted to make use of ZM with multiple cameras and also have it be useful and reliable, I needed significantly better hardware than the RaspberryPi. After some searching on Amazon, I found a refurbished HP Elite 8200 small-form-factor desktop on Amazon for $300. It was quite a bit more money than I’d wanted to put into this system, but with an Intel Core i7-2600 with four cores (plus hyper-threading) at 3.4GHz, 16GB memory and a 2TB spinning disk, I figured it would be more than adequate for four or more cameras (in fact the specs are shockingly close to my desktop computer, which was quite beefy when I built it three or four years ago).
That machine arrived two weeks ago and I installed Debian 9 on it along with the official ZoneMinder package, and it’s performing amazingly well. With one camera at 1920x1080 10fps in monitor mode and another at 1280x960 10fps in motion detection (Modect) mode, the system barely breaks a sweat with half of its memory free and half or three-quarters of the CPU cores idle. ZM is performing exceedingly well, with the web UI fast and streaming working very well. I’m still having some false positives from shadows when it gets very windy, but I have a plan for addressing that as well. Overall I’m really glad I switched to ZoneMinder with decent hardware, and plan on further improving and expanding this set-up in the future.
Notifications
One thing that ZoneMinder completely lacks is the built-in ability to notify immediately on new events/alarms. The closest that it has are “filters”, which run at a configurable interval (usually 60 seconds) and can be set to send email or execute an external command for new alarms. Unfortunately there are some issues around how they’re configured that result in either notification storms or severe delays when multiple short events happen in rapid succession. After using this method for a few days and researching other possibilities, I found the zmeventserver project, a daemon written in Perl that polls the ZoneMinder shared memory map for new events at a short interval and pushes them to clients via a websocket server. After some initial experimentation, I unashamedly hacked up the Perl source, ripped out the websocket server, and modified it to execute a shell command with the event ID as an argument (backgrounded with & so as not to tie up the Perl code).
For my event handler script I wrote something in Python that grabs the details of the event directly from ZoneMinder’s database, along with the first and best (most motion) frames, and sends them to me via email and Pushover. I’ve added a bit more to the script but it’s still quite a hack-ish proof-of-concept and too rough to share, but there’s really nothing terribly complicated about it: it gets called with ZoneMinder’s EventId, looks up that event and a bunch of related stuff in the database, and then generates an email and Pushover notification. I’m not sure if I’m going to keep using this or try to push most of the logic into HomeAssistant (see below); if I do stick with this script, I’ll make an effort to clean it up and publish the code.
Image Processing - IR Switch Detection
Once I got ZoneMinder relatively well tuned for motion detection in my environment and notifications up and running, my first bit of intelligence in the alerting process was disregarding events when the camera switched from visible light to infra-red mode. This IR switch occurs twice a day - visible to IR around dusk and IR to visible around dawn - and was a bit of an annoyance to me. When the switch-over happens, virtually all pixels in the image go white for a frame or two and the image switches between color and black and white. My gut reaction was to ignore events with a massive percentage of changed pixels around dawn or dusk, but that seemed too uncertain. With a bit of thought, I realized that detecting a change from color to black-and-white (or vice-versa) should be rather straightforward.
As the script was already written in Python, I installed pillow, a modern fork of the Python Imaging Library, and came up with the following snippet to tell whether a specific Frame from ZoneMinder is color or black-and-white (note this is a partial snippet with a lot of unrelated code removed):
from PIL import Image

class Frame(object):

    def __init__(self, **kwargs):
      # lots of internals redacted here...

    @property
    def filename(self):
        return self.event.frame_fmt % self.FrameId

    @property
    def path(self):
        return os.path.join(self.event.path, self.filename)

    @property
    def is_color(self):
        img = self.image
        logger.debug('Finding if image is color or not for %s', self)
        bands = img.split()
        histos = [x.histogram() for x in bands]
        if histos[1:] == histos[:-1]:
            return False
        return True

    @property
    def image(self):
        if self._image is not None:
            return self._image
        logger.debug('Loading image for %s from: %s', self, self.path)
        self._image = Image.open(self.path)
        return self._image
This loads the JPEG image (frame) from ZoneMinder as a PIL Image, splits the image
into its color-component bands (red, green, and blue), and then checks if the histograms
of the three color bands are identical. If so, the image is black-and-white.
My notification script simply looks at each event, checks if the first frame is color and the last is black and white or vice-versa, and if so suppresses the notification and renames the Event in ZoneMinder for later cleanup.
There is one issue with this method, when ZoneMinder loses signal from a camera it generates a completely blue frame until signal is regained. I’ve only had this happen once, but at some point I plan on modifying the above to ignore the blue “loss of signal” frames.
Monitoring
At this point I decided that I was sufficiently close to having a minimally-usable system that I should turn my attention to monitoring it, and making sure I’m alerted if it stops working. Since I’ve moved all of my personal services to AWS, I didn’t have an existing monitoring infrastructure for anything running in my home. Not wanting anything too heavy-weight or complicated, and having an existing Lambda function to handle re-notification of CloudWatch alarms, I hacked a “monitoring system” together using that Lambda function and API Gateway in a few hours.
The functionality is relatively simple: every five minutes a Python script runs on my ZoneMinder
system that does a bunch of checks and POSTS them to API Gateway as a JSON array of results. The
POSTed data for each check includes the timestamp, a check name, a boolean is_ok field, and
an optional string with additional information. API Gateway writes this information to DynamoDB,
and triggers a Lambda function if any of the is_ok fields changed from true to false. The
Lambda is also run every 30 minutes, and notifies me via email or text message if any of the
check is_ok fields is False or if any of the timestamp values are more than 10 minutes old.
For now, this should suffice as a really simple monitoring system. I also have a quick and simple
single-page web view of the current Dynamo contents.
The checks that I’m currently running are:
- System load average1
- Disk free space as reported by ZoneMinder
- ZoneMinder daemon status as reported by API
- ZoneMinder Run State (one of my custom values, not “stopped”)
- ZoneMinder SHM free
- ZoneMinder status as reported by
zmpkg.pl(“running”) - ZoneMinder UI - page loads and has a link to my primary camera
- zmdc process running
- zmwatch process running
- My custom event server process running (based on zmeventnotification.pl; see above)
- For each camera:
- Direct image check against the Amcrest camera
- Camera enabled
- Image check via ZoneMinder
- zmu frame rate
- zmu last frame time
- zmc process running
- zma process running if Monitor is set to a motion-detecting state
For the “Image check” tests, I do the following:
- Retrieve the binary image from the camera or ZM
- Use the python
imghdr.what()function to ensure it’s a JPEG image - Ensure that the size of the image matches what ZM thinks the monitor size is
- Use the PIL
getextrema()function to ensure that there’s more than one color in the image (i.e. fail if it’s an all-blue “signal lost” or an all-black image). - Ensure that the histogram of the image has more than 20 distinct buckets / pixel values.
1 I’ve usually found Load Average to be an often misunderstood metric, and one that people rely on much too often (generally without knowing enough about it). ZoneMinder exposes it prominently in the UI as one of the three health metrics, and while I’m not sure I agree with this, it is a good metric for the specific workload of this particular system of mine. If you’d like to learn more about Load Average as a performance metric on modern Linux systems, system performance expert and current Senior Performance Architect at Netflix Brendan Gregg has an excellent blog post, Linux Load Averages: Solving the Mystery.
Neural Network Object Detection
When I was researching how other ZoneMinder users are attempting to reduce false positives, I came by a post on the ZoneMinder Forums from someone who is using Joseph Redmon’s Darknet yolo3 neutral network object detection implementation for detecting and localizing meaningful changes in ZoneMinder’s captured frames. This idea immediately appealed to me; if I could reliably tell whether a frame contains a person, for my purposes as a security system, that would completely solve the environmental false positive problem. I was also very interested in Darknet yolo3 as it is simple to build and distributes pre-trained models - my initial testing was as simple as cloning a repo, downloading a few files, running make, and then running the included command-line script on a JPEG image. I was pretty amazed at how accurately it recognized the person, car, and dogs in the image I selected. There is also a Python wrapper around yolo3, yolo34py, which I found quite easy to use.
Using yolo34py I was able to relatively quickly add object detection to my Python-based ZoneMinder event notification script. Over three or four days of testing, I found yolo3 using the pre-trained model to be extremely accurate across all of the events my camera captured. The one down side was that, running on my Intel i7-2600 at 3.4GHz, it was taking a full ten to fifteen seconds per frame to run the object detection. That’s fine for testing, but if I were to rely on this as an alarm system, I’d want something considerably faster.
A cursory glance at the Darknet documentation told me what I already knew - though I have no prior experience with the subject - that running neural network image processing with any reasonable speed requires a GPU. I decided that I could allocate around $100 to speeding up the detection given the Darknet documentation’s claim of a 10x or better speedup on a GPU. I found that about the best $100 GPU I could get on Amazon was a 1GB Nvidia Quadro K600, so I purchased this PNY card.
When I got the card and requisite software installed and recompiled Darknet with CUDA support and attempted to run detection on an image, I was rather dismayed to be greeted with an error message:
0 CUDA Error: out of memory
darknet: ./src/cuda.c:36: check_error: Assertion
0failed.
Unfortunately, after just googling that error for Darknet, I found quite a few GitHub issues and mailing list threads explaining that Darknet Yolo3’s default (and most accurate) model requires about 3.6GB of GPU memory, far too much for my 1GB card (at the moment, 4GB GPUs start at $500USD).
Luckily for the fate of my project, Darknet also has a pre-trained “tiny” model designed to work for low-memory GPUs - like the apparently-puny one I just bought. The project states that its accuracy is only about 2-3% lower, though the results I’ve seen are noticeably inferior especially when two objects are in close proximity or overlap. For the time being, I’m still getting notified by my Python script for every motion detection event, along with the YOLO object detection results. I’m saving every event that has questionable results for later comparison against the full (albeit slow, running on CPU) model and possibly other object detection tools.
HomeAssistant and Z-Wave
Just before I began experimenting with Darknet object detection, I decided that the number of false positive motion detection events I was receiving merited investigation into a more classic alarm system approach. I also received a coupon for the SimpliSafe home security system in my address change packet from the USPS. After a fair amount of investigation I decided that there weren’t any off-the-shelf wireless home alarm systems that seemed attractive to me (I don’t really need central monitoring, but I do need to be able to access the system and status programmatically) but this did get me doing some research, and I found there is a wide array of alarm system components using the Z-Wave radio technology that seemed suitable for a DIY system.
One of my colleagues speaks quite highly of HomeAssistant, an open source (though Apache licensed) home automation suite written in Python3. Browsing through the project’s website and documentation, I became reasonably confident that it could handle my needs for an alarm system (it has a fair amount of built-in logic for this use case, and other people actively use it for this) and that it also integrates natively with Z-Wave. Even better, it also has a native integration with ZoneMinder to tie the two systems together.
I’m really, really liking HomeAssistant so far, but I’ll leave the details of that for a future post.
Door/Window and Motion Sensors
After a bit of research, I determined that I wanted Z-Wave Plus components for their better (than none) security and advanced features and purchased some initial Z-Wave components to test from Amazon: a USB Aeotec Gen5 Z-Stick Z-Wave controller for $45, an Ecolink Z-Wave Plus magnetic Door/Window sensor for $30, and an Ecolink Z-Wave Plus PIR Motion Sensor for $40. I figured that was a reasonable enough price to test the system and determine how well it works, and either move forward or return the items.
So far I’ve had the Z-Wave components running via HomeAssistant for seven days, with the door sensor on my front door and the motion sensor placed atop the adjacent window. I’ve configured HomeAssistant to do nothing more than notify me via Pushover when the door opens or motion is sensed. So far in a week, I’ve received zero false-positive alarms and zero false-negative alarms, so I’m quite happy. The motion or door opening signals make it from the sensors to HomeAssistant, out to Pushover, and to my phone within one to three seconds, which seems quite reasonable to me. The “pet immunity” on the motion sensor is still triggered by my two dogs walking around, but that’s rather expected since they’re fifty-five and seventy pounds, respectively, and not a problem since they’re crated whenever I’m not home. I’m quite happy with the performance of both of these sensors so far.
Thermostat
Last weekend, after unpacking and enabling my two RaspberryPi-to-Graphite temperature sensors, I finally determined that I’m not going crazy but the thermostat in my house was. It was wildly inaccurate, and letting the house overheat during the day and then over-cooling at night. I knew I had to replace it and, having seen that HomeAssistant supports climate control systems, immediately remembered my dream of having a computer-controlled thermostat that I briefly explored since I first built a crude solution back in 2008.
After a short search on Amazon, I found the Iris CT-101 Z-Wave thermostat. It’s a touchscreen 7-day programmable thermostat with Z-Wave, essentially the same unit as the Radio Thermostat CT-101 but intended to work with the Lowes Iris home automation system. A number of the positive reviews mentioned it working with HomeAssistant or other F/OSS home automation systems, and the $40 price was well below most networked thermostats and about the same as a normal “dumb” 7-day thermostat at local stores.
So far I’m quite happy with it. I had some initial concerns - even though the device is constantly powered and even a Z-Wave repeater, I had to configure HomeAssistant to explicitly poll it on a regular interval for up-to-date information - but now that I’ve figured it out, the thermostat seems to be working quite well. I can view the current and target temperatures, the operational/power status of my HVAC system’s fan and compressor, and set the target temperature and on/off controls. The unit does show up as two separate controls - heating and cooling - but that seems to be the standard for Z-Wave climate controls and logically matches up with the physical thermostat’s “heat/off/cool” controls. I haven’t done any automation with it yet, but at a minimum this should make it easy for me to control heating and cooling based on different temperature sensors throughout the house at different times of day.
What’s Next
This past weekend I purchased two more outdoor Amcrest WiFi cameras - this time the IP2M-852W 1080P models with an impressive 128º field of view - to complete my camera coverage, as well as a few more of the same Z-Wave door/window sensors, a pair of Z-Wave lightbulbs to try, and some well-reviewed ZOOZ Z-Wave 4-in-1 sensors that combine motion sensors with light level, temperature, and humidity. Over the next week or two I’ll be installing all of that to finally finish the system, and also spending quite a bit of time customizing HomeAssistant to be the heart of it all. I’ll share my experiences in follow-up posts, but some of the things I have planned include:
- Experimenting with some other machine-learning-based object detection implementations
- Localizing detected objects to a ZoneMinder zone in the image, and using that to determine whether to alarm or not
- Modifying the ZoneMinder HomeAssistant integration to know about run states
- Using HomeAssistant’s alarm control panel component to implement real alarm system logic, with notifications to my phone
- Having my Amcrest ProHD pan/tilt camera, which has clear line of sight to both front and back doors, pan to a door and capture a snapshot when the door sensor activates.
Comments
comments powered by Disqus