I’ve done a lot of work on my DIY HomeAssistant-based home automation and security system since my last post on it just over a month ago. While it was a lot of work and frustrating at times, I’m happy to say that I think I’ve finally gotten everything to a usable and working state, and I don’t currently have anything left on my to-do list for this project. I have four working security cameras that run both motion detection and object detection and notify me if a person is detected, a functional alarm system for unauthorized entry, and a few home automation conveniences.
Virtually all of the code and configuration backing this is available in my home-automation-configs GitHub repo but I want to use this post to go over each of the major components as well as some of the difficulties I encountered.
Security Cameras
About a month ago I purchased the two more security cameras I’d been thinking about, a pair of WiFi Amcrest IP2M-852W 1080P with a super-wide 128º field of view. After switching out the IPM-723W (960P / 92º FoV) on my front porch for one of them and mounting the other on the far side of the house, I now have a total of four cameras (three outside, one inside) and coverage of both entrances to my house and all meaningful approaches to the property.
One thing I didn’t take into account, unfortunately, was the signal strength from my aged (in-service 24x7 for ) 2.4GHz Ubiquiti Networks access point at the far corners of the house. After a sweaty, hot summer afternoon up on a ladder mounting a camera at the back corner of the house and attempting in vain to aim it using the stream over WiFi, I realized that the construction of my (rental) house causes severe signal shadows at the back corners. I spent a fruitless few hours trying to set up a Netgear WN3000RP “WiFi Range Extender” that I picked up at Best Buy (the setup process was horribly frustrating and error-prone even for someone who worked as a wireless network engineer) only to realize that it was actually a layer 3 router and nothing connected to the extended network could be accessed from my LAN.
After spending another afternoon considering some options - moving my AP or adding another, neither very feasible in a rented house that I don’t want to run permanent cabling in - I ended up using existing holes and wiring paths to hook up both cameras with wired Ethernet. In retrospect, I should have done either a proper wireless site survey or at least some spot tests with my phone or laptop beforehand. It would’ve been much faster if I’d known about the poor signal beforehand, and I also would’ve purchased PoE cameras instead of using the WiFi models which ended up requiring both Ethernet and power cables. On that note, my one complaint so far about the Amcrest cameras is that they are either wired Ethernet with PoE or WiFi with separate Ethernet and 12V DC power cables. I’m not quite sure why they were designed this way as opposed to all supporting PoE, but I assume there’s a manufacturing or cost reason.
One thing that I have noticed in the past month of having both wireless and wired cameras is the difference in frame rate. While my one outdoor camera that’s actually using the 2.4GHz WiFi works acceptably well, ZoneMinder is all too happy to show me that it runs at between five and nine FPS, whereas the indoor WiFi and outdoor wired cameras run at the full configured 10FPS rate. If I had to do the camera installation over again, I would’ve spent much more time assessing the 2.4GHz coverage around my house from my existing AP and likely considered PoE cameras for all of the outdoor locations.
Neural Network Object Detection
In my last post, I mentioned how I started passing still images from motion events through Joseph Redmon’s Darknet yolo3 neural network object detection library. With some caveats this has worked out extremely well. While I’ve decided that my cameras are mainly for remote monitoring and possible evidentiary value, and not really for use as an alarm, I’m still pushing notifications from them to my phone when my alarm is armed; I’m just not relying on them as a primary means of detecting a problem.
One down side to my current setup is the “tiny” version of the yolov3 model that I’m forced to use because of my poor choice of graphics card. I got the feeling that the performance of the tiny model was significantly worse than the full version and, sure enough, comparison tests on the same images proved that. It seems reasonably good at detecting people, but has a relatively high number of false positives. To compensate for this, I’ve built functionality to ignore certain objects in certain locations in to my image processing scripts; I can now easily log but ignore when yolo detects a stump in my front yard as a cow, or my porch railing as a bench.
My current code for handling ZoneMinder events, available on github implements what seems to me to be a reasonable workflow for my needs. When events are detected by ZoneMinder a selection of frames - first, last, and a variable number of high-motion (high-score) frames - are passed through yolov3-tiny object detection. Using the tiny model and 1920x1080 frames, this takes about 1/4 second per frame on my GPU. Once a list of detections is obtained (category, confidence level, and bounding boxes for each detected object) it parses the Notes field on the ZoneMinder event to determine what zones motion was detected in, then retrieves the coordinates of each zone on the monitor form ZoneMinder and calculates which zones contain each detected object. All of that information is used to evaluate - via a configuration file - which objects should be ignored. All of this information - the ZoneMinder Event details, object detections and their containing zones, etc. - is passed to HomeAssistant as an event, where it’s picked up by an AppDaemon app.
Tie-In with Alarm System
Once the ZoneMinder events/alarms are sent to HomeAssistant as events they’re picked up by an AppDaemon app, zmevent_alarm_handler.py. This handles the logic behind whether or not to send me a notification for a given ZoneMinder alarm. The logic I’m currently using is as follows:
- If my alarm system is disarmed, no notification.
- If no objects were detected by YOLO3, no notification.
- If the only motion was in the “Street” zones, no notification. I have distinct zones for the road in front of my property, and record motion there but don’t alert on it.
- Formulate a short string describing the objects detected and what zones they’re in, for use in notifications.
- If an
input_booleanin HomeAssistant called “silence_cameras” is not on, send a Pushover notification to my phone containing the description of the alert and the highest-motion frame containing the detected object(s). - Send an email containing all analyzed/detected frames as well as the full details of the event.
So far this is working quite well for me. I get very few false positives with the above logic combined with object detection, only get notified if my alarm system is armed, and as far as I can tell get notified 100% of the time a person is on my property.
Alarm System
My traditional alarm system hasn’t changed much since my last post. I have door/window sensors on both entry doors to the house as well as the gate to my fenced yard and the door on the crawlspace under the house. I’ve added motion detectors in most rooms, but because of problems with the sensors I chose (more on that below) I only have one in use as a trigger for the alarm, a more reliable model than the other four I purchased. With the addition of a physical control panel near the front door (more on that below as well) it’s working quite well for me. I’ve had zero false positives so far, and a 100% detection rate based on HomeAssistant’s logs of the sensors (and my own occasional forgetting to disarm the system before I open a door). There’s still something to be desired in terms of reliability of notifications as it relies on my cable Internet connection, but I do get notified within five minutes by offsite monitoring if my Internet connection goes down. If I really wanted more than that, I’d look into some sort of cellular backup connection.
The overall functionality of the system is incredibly basic: when armed (input_select in HomeAssistant) and one of the sensors is tripped, it pushes a loud high-priority notification to my phone via Pushover. I opted not to use HomeAssistant’s state machine-based manual alarm control panel component and rather implement my own logic in AppDaemon. I have an input_select with three options: Disarmed, Home and Away. The alarm does nothing in “Disarmed” state. The “Home” state uses only external (door/window) sensors for trigger and the “Away” state also includes interior motion sensors. This trinary state is also used to control whether ZoneMinder events notify me, as described previously. My logic doesn’t include any “triggered” state or delay; I get one notification for every sensor trigger. It also doesn’t include any arming delay, but since I built and installed a real physical control panel near the door, it includes a configurable delay (currently 10 seconds) to give me time to disarm before triggering the alarm if it’s currently in the Away state.
One added bit of fancy-ness that I put into the alarm is integration with ZoneMinder and my cameras. All of the doors (as well as the fence gate) have external coverage by outdoor cameras, and the front and back doors also share internal coverage from a PTZ camera mounted in view of both of them. When the alarm is armed and a door sensor trips, the AppDaemon app that handles the alarm captures images from whatever cameras have a view of the door that opened (including panning the indoor camera if needed). Those images are included in the Pushover notification that I receive, making it much more informative than just knowing that a particular door opened.
Zooz Multi-Sensors
In my last post I mentioned that I’d purchased some Z-Wave security sensors, including a $40 EcoLink PIRZWAVE2.5-ECO Z-Wave Plus PIR motion sensor “with PET immunity” (I’m pretty sure they mean domestic animals, not Positron Emission Tomography). I originally just set it to lowest sensitivity (via a physical jumper) and balanced it on top of the blinds in my living room to see how it worked. I was pleasantly surprised to find that it seemed to work perfectly - it triggered every time I moved in the room, and never when no person was in the room. After a week or so I decided that it was working well enough to order some more for full coverage of my house. I put the EcoLink PIR sensor in the back room that I use for storage and the cats’ food and litter boxes, and in the month-plus since then it’s had a 100% accuracy rate.
When I began shopping for four more sensors, though, I was tempted to see if I could find something a bit less expensive. As I’d just gotten my Z-Wave thermostat working, I was really intrigued by the $36 ZOOZ ZSE40 4-in-1 sensor, version 2.0 which combines a PIR motion sensor with sensors for light, temperature, and humidity. I figured these would let me save a tiny bit of money while also getting the bonus of temperature sensors in every room, and the PIR motion sensors have seven levels of sensitivity - settable over Z-Wave - which I figured would be more than enough to get them to ignore my cats.
The Zooz sensors only had a 3.5 star rating on Amazon and lots of negative reviews, but it seemed that most of the reviews were for the older (non-2.0) version. Unfortunately I didn’t heed my concerns and bought four of them, and I’ve regretted that ever since. Setting them up initially was nowhere near as simple as the EcoLink products, since they’d usually end up going to sleep before they completed pairing with my Z-Wave controller. The same was true of their seven-level sensitivity; each change required me to run around the house with a laptop and paperclip, setting the sensitivity I wanted and then waking the device up with the paperclip. This often required multiple cycles per sensor until the setting change took. Lastly, and most importantly, the machine I have running HASS and my Z-Wave network went offline for about six hours a few weeks ago. All of my other battery-operated sensors came back online within 30 minutes of getting HASS up and running again, but these took up to four hours to come back even after manually waking them up.
After all of that, even on the lowest of the seven sensitivity levels, my cats still set them off. The motion sensing is adequate for controlling lights, but causes false alarms quite often for security purposes. I’ve only had them for about a month and a half, but one of the four is now completely dead - it won’t even blink when I replace the battery. The temperature sensors are adequate, but not terribly accurate and suffer from serious lag problems. The light sensors function but report in percentage instead of any actual measurement of light and the scale seems poorly calibrated for indoor use unless the sensor is pointed directly at the dominant light source. The sensor in my kitchen (which is pointed almost directly at the ceiling fixture) reads near 80% with the light on, about 60% with the light off during the day, and about 20% with the light off at night. However, the sensor in my bedroom reads about 2% when dark at night and only increases to about 10% with the light on during the day.
In all, I was tempted by the prospect of being able to get motion, temperature, and light level sensors all in one package and for a really low price. I ended up getting what I paid for - a $10 motion sensor, $10 temperature sensor, and $10 light level sensor. If I had to do it over again (or, when I eventually do) I’d get more of the EcoLink motion sensors and add some dedicated temperature/light sensors where I need them.
Control Panel
After using my alarm system for a few weeks, it was clear to me that relying on proximity detection of my phone (updated by GPS using the GPSLogger app) or the HASS web interface to arm and disarm wasn’t going to work. The presence detection often didn’t update fast enough if I was driving to or from my house and disarming via the HASS UI just took way too long - especially since my phone connecting to WiFi when I get home causes problems with this. After giving it some thought, I decided to build a physical alarm control panel. I did some quick proofs-of-concept using the HASS WebSocket API, static HTML and Javascript served by HASS itself, and an AppDaemon app to handle the logic. It’s not pretty, but it gives me a working interface that handled my main requirements:
- Control of the lights in the room
- Arming in either Home or Away modes, with a configurable delay for arming in Away (and ensuring all external door sensors are closed before arming)
- One-touch diarming from Home state
- Code-entry disarming from Away state, with a configurable delay between sensor activation and alarm trigger
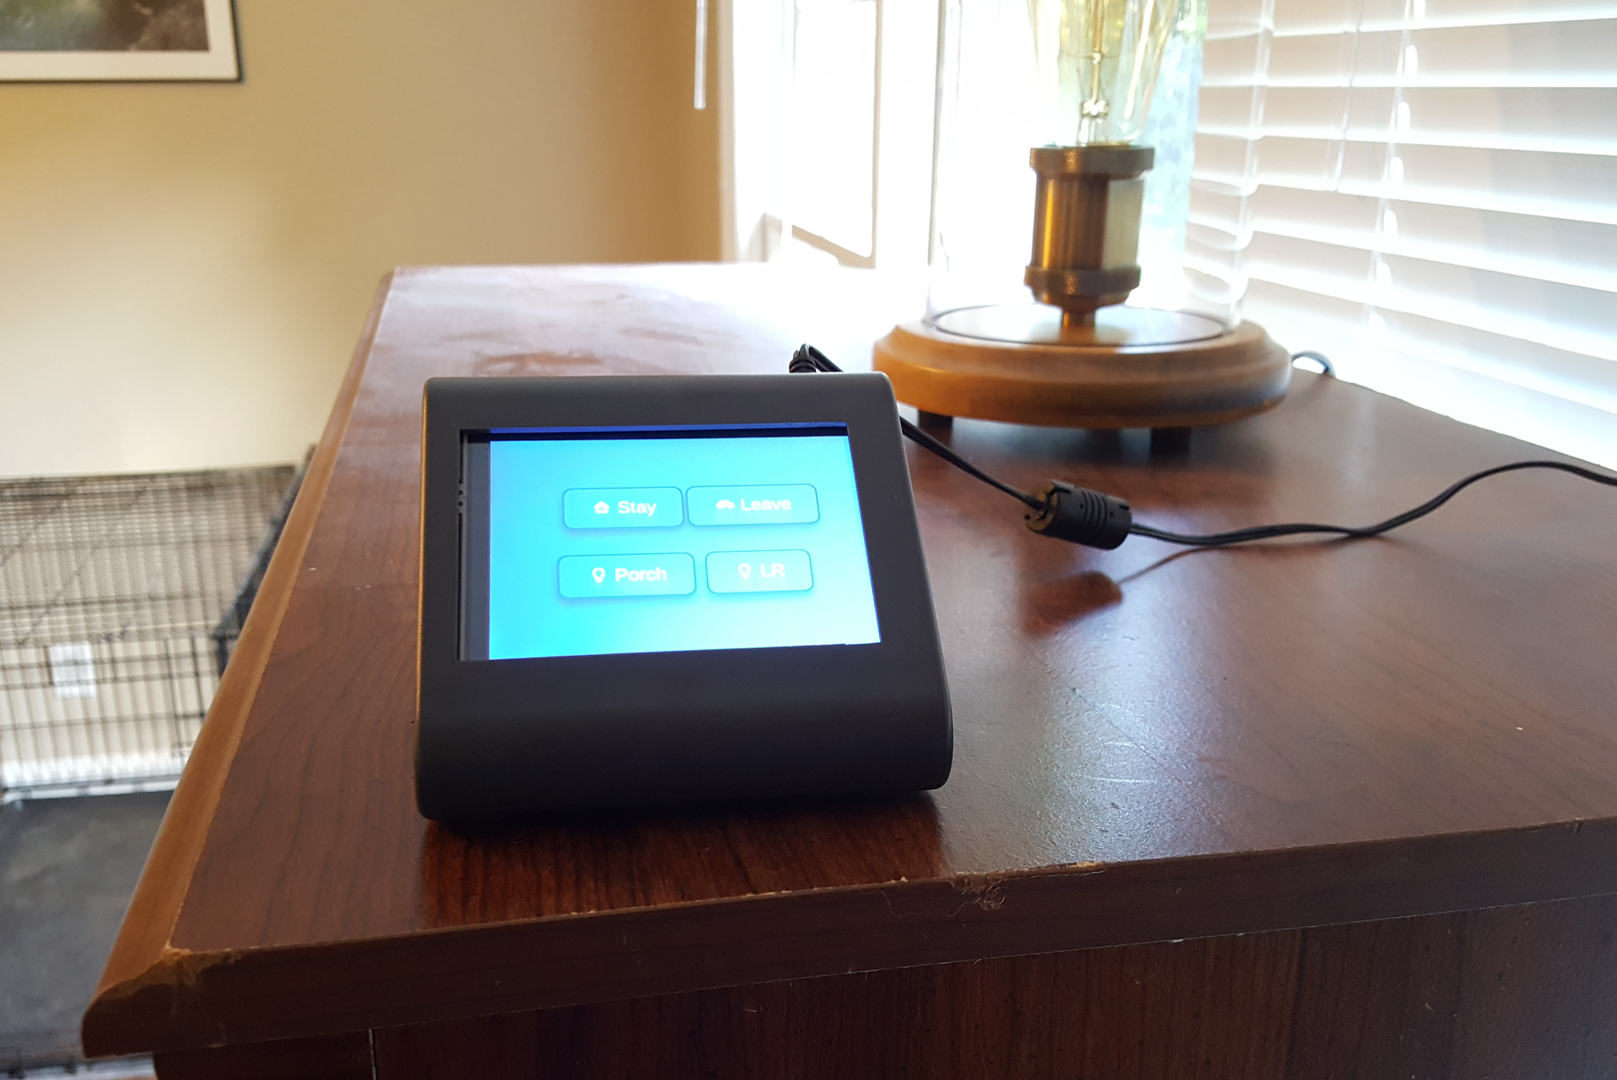
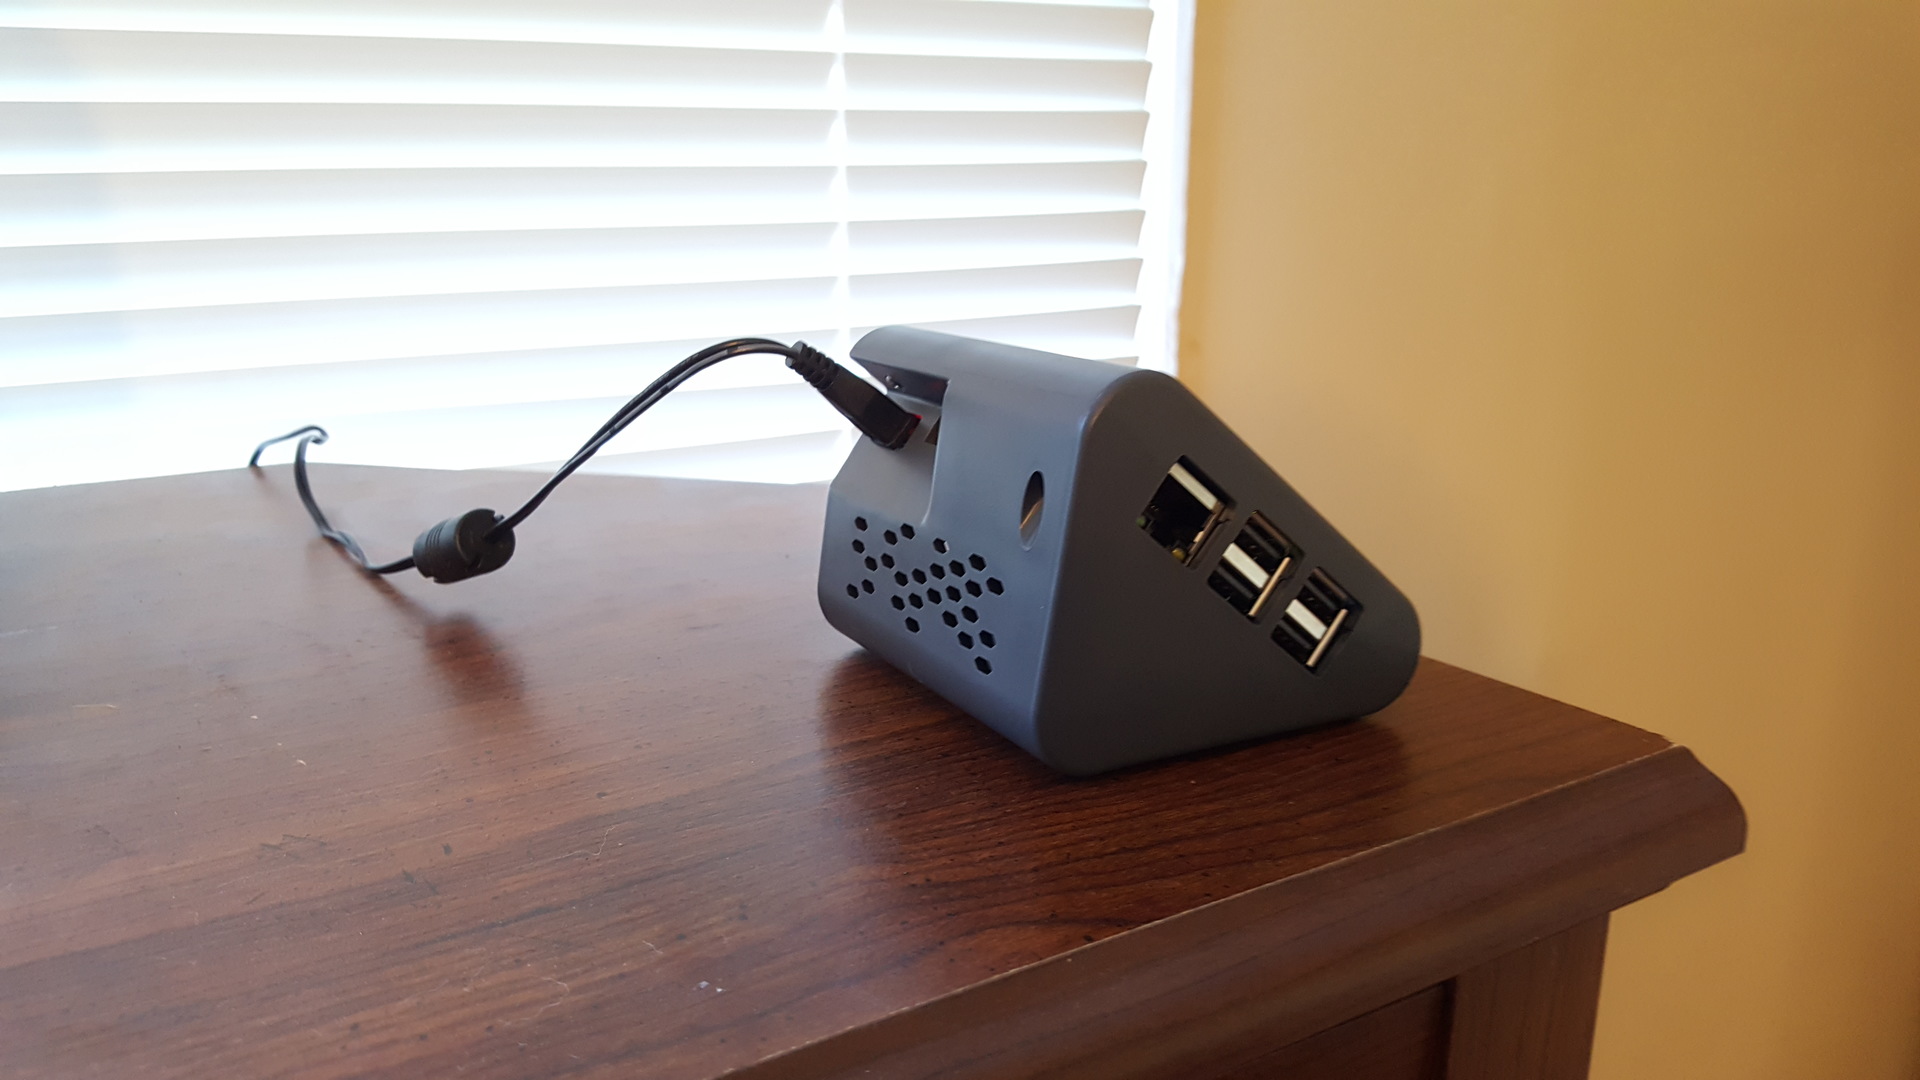
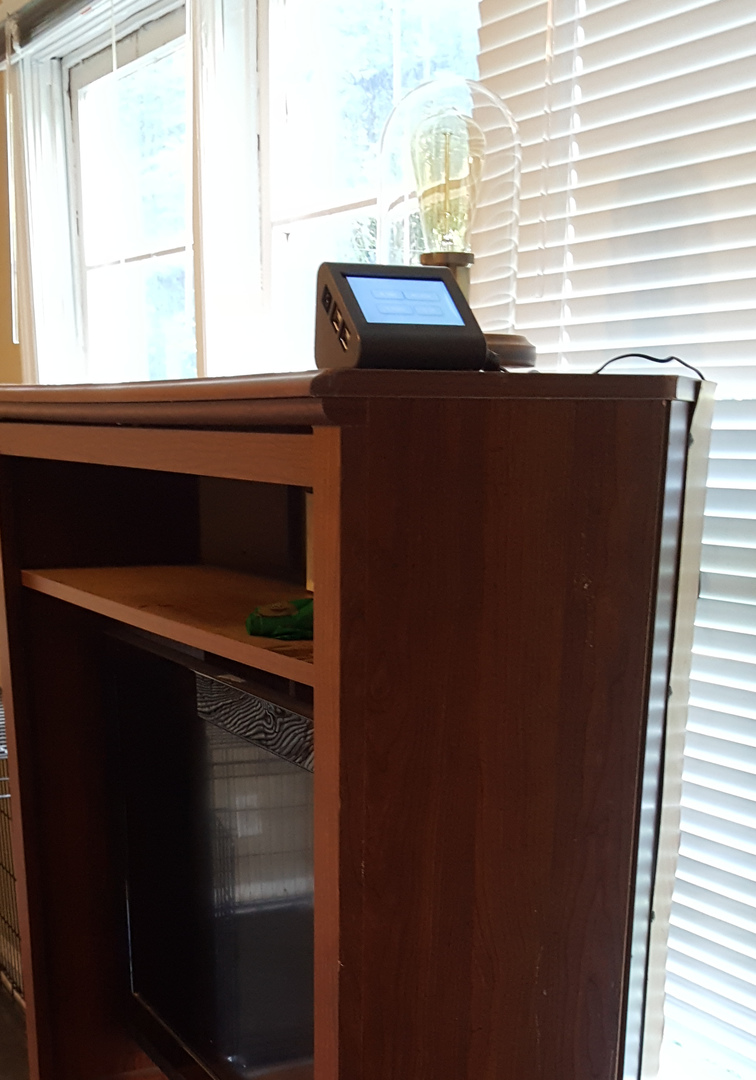
After getting the software side of that working locally on my desktop computer, I decided that I’d use a Raspberry Pi 3B+ that I already had for the control panel. I ordered a simple 320x480 3.5-inch TFT touchscreen from Amazon, along with a decent case for the Pi and screen, for about $46 total. Assembly and getting the software up and running was pretty easy (my notes are on GitHub here) and I had it up and running in an hour or so. This has really helped make the alarm more usable, since I have the touchscreen near my front door and can just tap a button to arm on my way out the door, and have fifteen seconds to enter a code when I get home.
Here are a few photos of the finished unit currently hanging out on top of the entertainment center in my living room, just a few feet inside the front door:
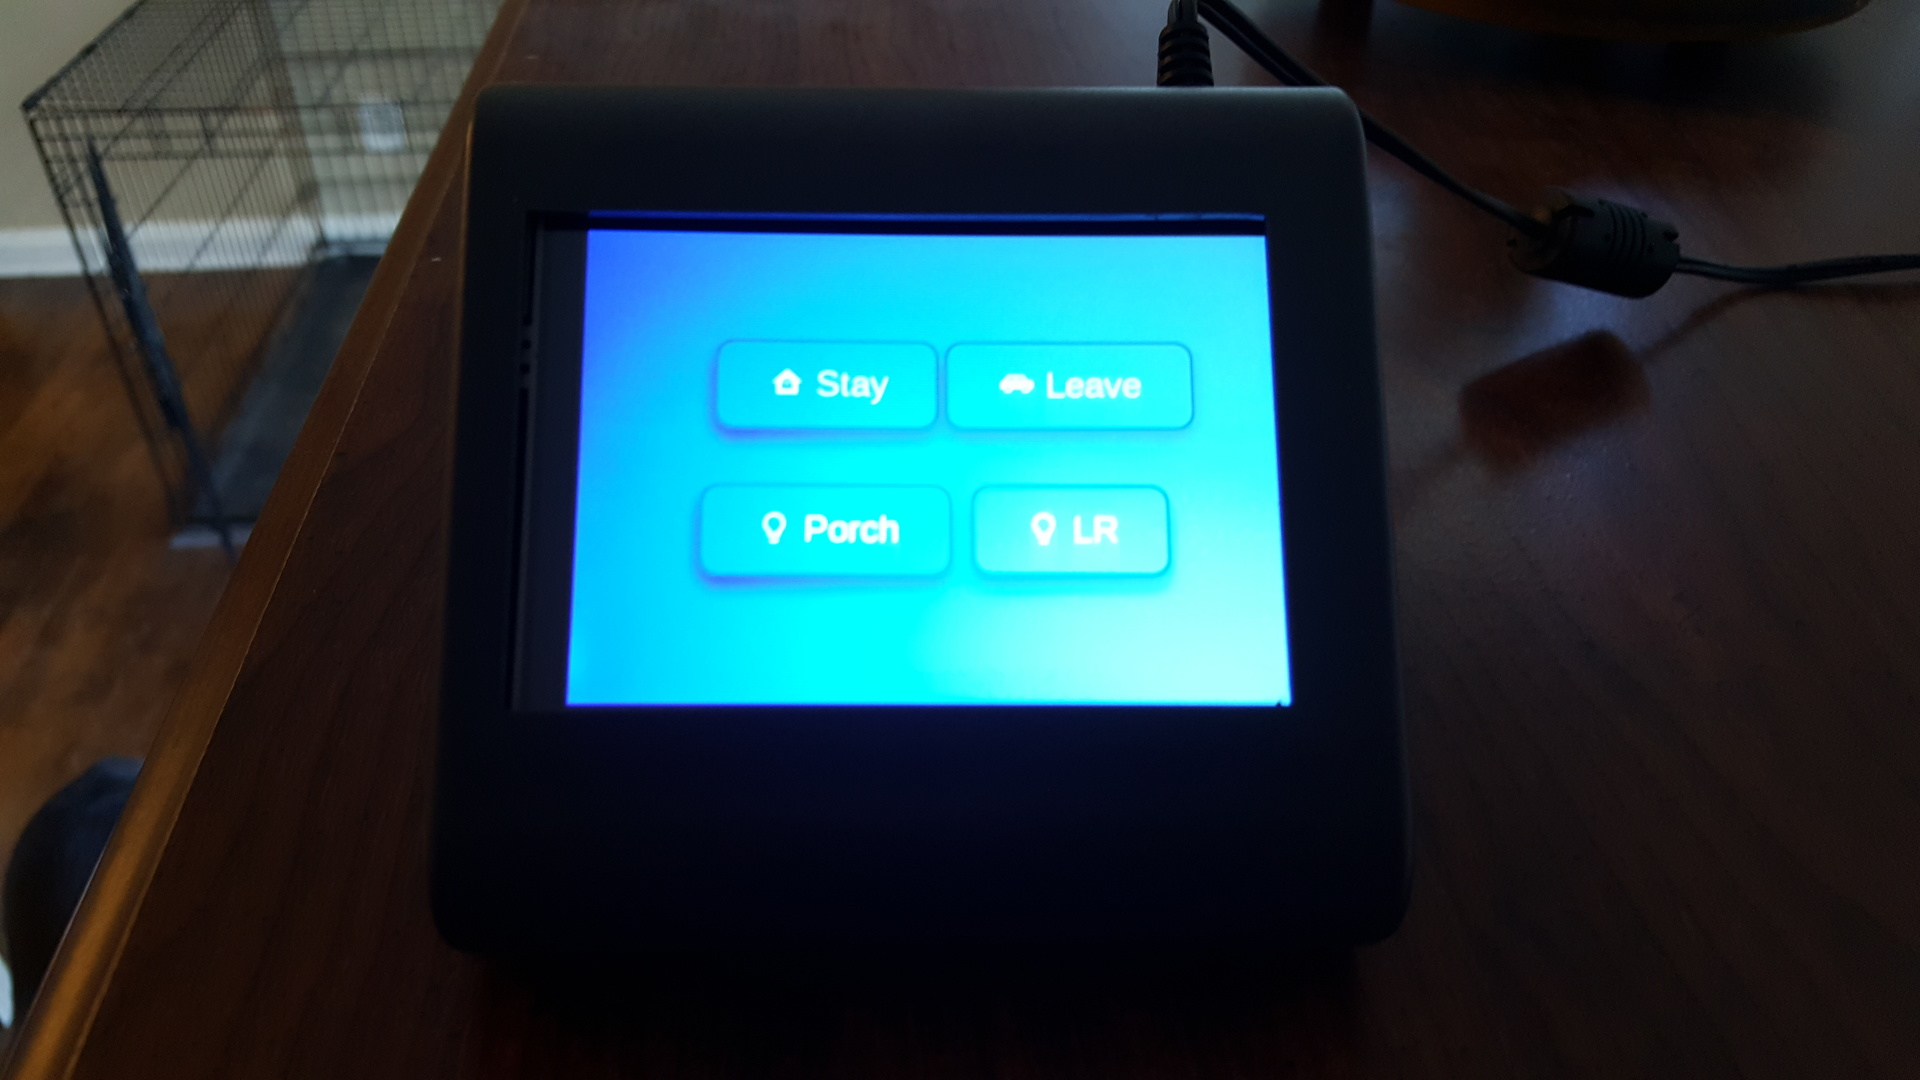
And some screenshots of the really simple UI that I set up for it:
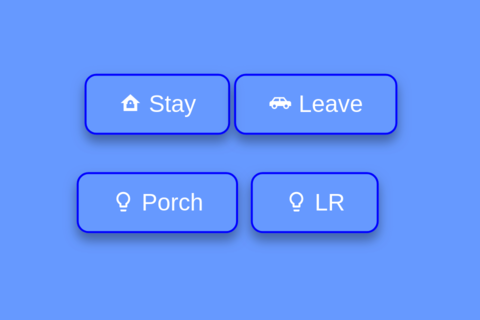
Disarmed:
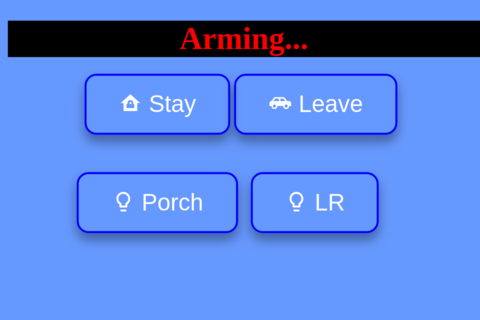
Arming Away (exit delay):
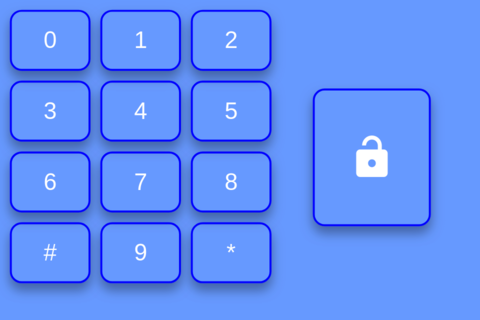
Armed Away:
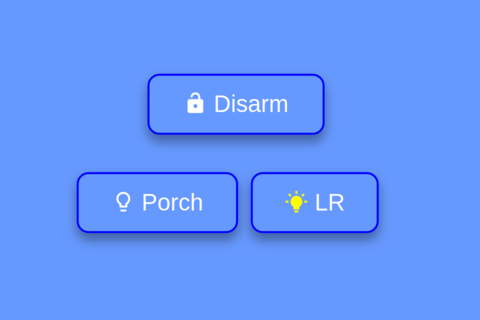
Armed home:
All of the code for this is available in my GitHub repo:
- notes on the hardware and software
- HTML, CSS and JS for the UI
- appdaemon app
- some scripts I use for running it locally
Home Automation
I haven’t delved too deep into the home automation side of things yet, and am going to try not to go overboard with it. The Z-Wave thermostat that I mentioned previously is working well, but unfortunately the undersized and poorly-installed HVAC system in my poorly-insulated house renders it largely moot; in the summer heat the air conditioning can’t keep up anyway so there’s little need for me to change the thermostat. I do have motion-activated lights in my kitchen which has proved quite convenient and satisfying, and I’ve also set up some automations around my front porch light to automatically turn it on when the front door opens and it’s dark outside and to turn it on just before I arrive home when I’m away from the house at night. I’ve also set up an automation in HASS to detect when I first turn on my bedroom light in the morning, and automatically disarm the alarm and turn on the kitchen and living room lights. I’m going to try and make this the end of my home automation experiment, but I’m sure I’ll give in and add a few more pieces over time.
Comments
comments powered by Disqus