The work I’ve been doing lately with my IP security cameras was unexpectedly put on hold this past Monday evening when an extremely close lightning strike fried my router, switch, and the wired (motherboard on-board) Ethernet port in my desktop computer. The best I can tell the surge must have come in over the coax to my cable modem, as the only devices effected were in close physical and Ethernet proximity to it (and the electrical service comes in to the opposite corner of the house from the cable, and everything else was fine). I’d been thinking of replacing my aged PCEngines Alix.2c1 router running VyOS for a while, but it was still working (despite running constantly for eight years) and I wasn’t quite sure what Linux router hardware exists these days.
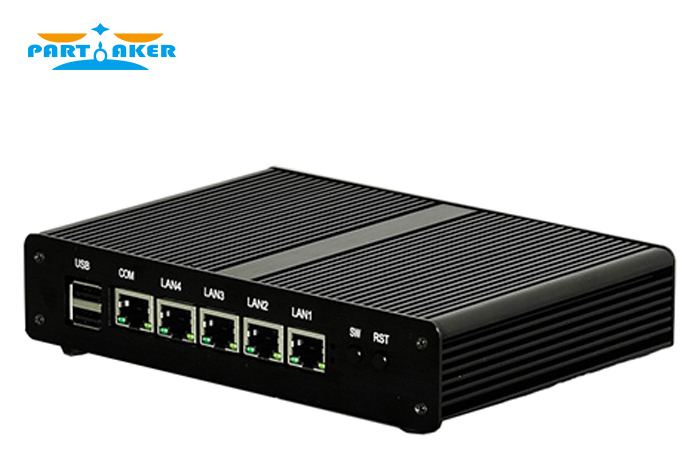
Luckily (and somewhat amazingly) both the cable modem and all of my desktop except for the onboard ethernet were fine. But that left me in need of a new system for my router ASAP. After about an hour of looking around on Amazon, I settled on this Partaker I5 system. For USD $230 I got a small (approximately 5x5x1.5 inches) box with a 2.42GHz Celeron J1900 processor, four Intel gigabit NICs, VGA, serial, dual USB 2.0, 4GB RAM and a 32GB SSD - about four times my old router in every measure. Despite having no reviews on Amazon, I decided to give it a try half because I could get it next day (which wasn’t possible with the newer PCEngines APU boards, though they’re half the cost) and half because the description listed it as compatible with RouterOS, Mikrotik, m0n0wall, IPCop, etc. It also appears visually to be very similar to the Protectli FW1 which is both listed in the VyOS wiki and has their own page on installing VyOS.
After a few minor hiccups in the installation process, I’m happy to say that this little network device is working amazingly well. I’ve only had it running for about 24 hours so I can’t speak to longevity, but it worked fine out-of-the-box (it shipped with pfSense installed) and seems to be doing the job exceedingly well.
The installation was straightforward using VyOS x86_64 on a USB flash drive, though I did find out some interesting bits of information about this device - which shipped with zero documentation whatsoever - that may be of use to others:
- There are two small tactile buttons on the front labeled “SW” and “RST”. RST is, as I figured, a reset button. SW is actually the power button. Press it once and the system turns on. Press this scarily easy-to-hit button again, and it sends a shutdown signal to the OS.
- The board runs AMI BIOS, and the BIOS prompt is very short. It took me a few cycles of resetting the machine and pressing Delete on my keyboard, as fast as I could over and over, to get into the BIOS.
- When I first booted the VyOS install flash drive, it failed to load with a slew of USB errors. I was able to fix this in the BIOS by navigating to Chipset -> South Bridge -> USB Configuration, disabling XHCI and enabling USB 2 EHCI.
- By default, the BIOS is set to stay powered down when power is restored, which is definitely not what I want in a network device. Chipset -> South Bridge -> Restore AC Power Loss is the setting to fix this.
- After some intense worry that my brand-new router was defective, I found that the Ethernet port labeling on the device is the opposite of how Linux sees the interfaces; the leftmost interface labeled “LAN4” is actually eth0, and the rightmost interface labeled “LAN1” is eth3.
I’ll update this post if I have any issues with it, but as far as I can tell this is a very nice, if not terribly cheap, device to use as a network appliance.
Now that my move is done and my network is mostly back in operation, I plan on writing another post sometime soon on the progress I’ve made with my IP camera system.
Comments
comments powered by Disqus